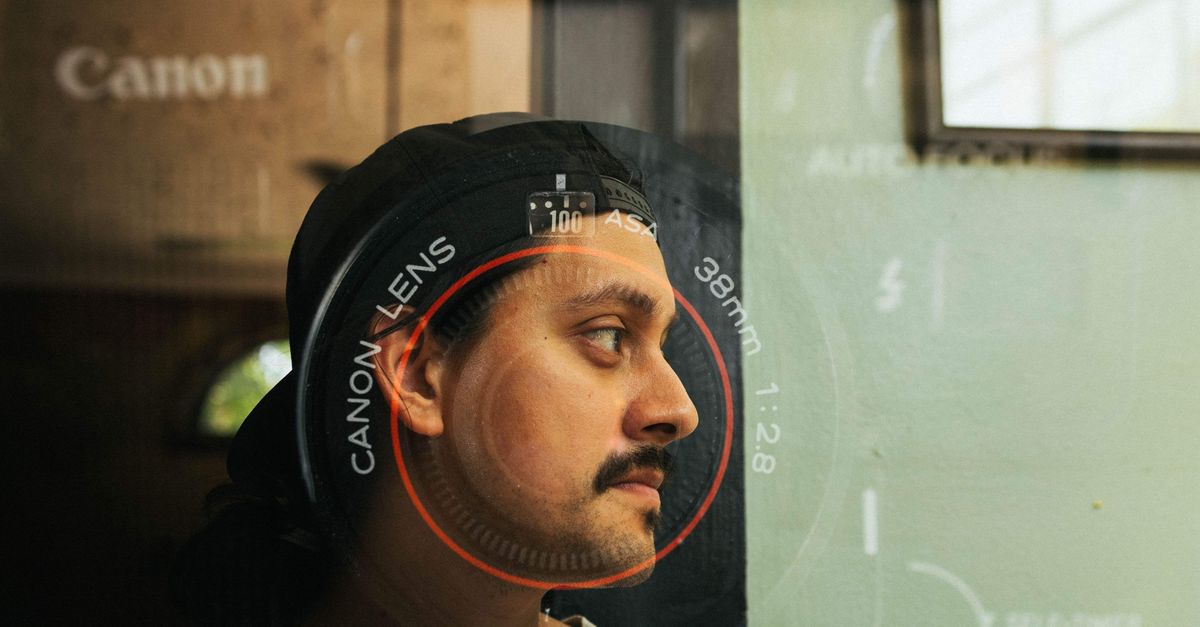
An image overlay alternative that runs locally in your browser lets you place a second picture on top of a base picture while keeping the base at its original pixel size, choosing from five fixed positions, and tuning scale and opacity — all without uploading either file. Image Overlay is one such tool. It accepts a base JPG, PNG, or WebP and a second overlay JPG, PNG, or WebP, both up to 25 MiB on disk and capped at 20,000 pixels per edge and 40,000,000 total pixels after decoding. Position is one of five choices (center, top left, top right, bottom left, bottom right); scale runs from 10% to 200% of the overlay's own natural dimensions, and opacity runs from 0% to 100%. The output is a PNG whose width and height always match the base exactly. No account, no upload, and no server-side processing are required at any step. Because the draw plan is the same one the production renderer uses, the preview you see and the file you download share identical pixel math, and selecting a new position, scale, or opacity revokes and removes the previous result; a new PNG is produced only when you click Create.
What "image overlay alternative" really means
People searching for an image overlay alternative usually have a specific pain with their current tool: forced uploads, account creation, watermarks on the output, hidden resizing of the base image, or unpredictable output dimensions. An alternative worth considering solves the same task — place image B on top of image A at a chosen spot with chosen visibility — but changes at least one of those trade-offs. The cleanest alternatives are the ones that make every trade-off explicit instead of hiding it behind a "free" label.
The trade-offs that matter most are: where the files go (server or browser), whether the base is silently resized, whether the output format preserves transparency, whether you can position the overlay precisely, and whether you need an account. Any tool that ticks the right boxes for your situation is a viable alternative; the next sections explain why each of those boxes matters and how Image Overlay handles them in practice.
Why a local, browser-based workflow changes the trade-offs
A browser-based, no-upload workflow means your base image, your overlay, and the resulting PNG never leave the current tab. The browser decodes both files, draws them onto an HTML canvas using a shared renderer, exports the canvas as a PNG, and offers the file for download. Temporary ObjectURLs are revoked when you replace a file, run again, or close the tool, so nothing lingers in memory beyond what is needed for the current step.
This matters in three practical ways. First, you can use private or work-in-progress images without sending them to a remote service. Second, because there is no server round-trip, the result you see in the preview is the same pixel data you will download — no hidden compression or resizing step on the back end. Third, the base image's natural width and height determine the output canvas exactly, so a 1600×900 base always produces a 1600×900 PNG. The page layout may scale the preview down to fit the screen, but those CSS dimensions never touch the pixels used for rendering or download.
For a more detailed walkthrough of the same no-upload approach, see our guide on overlaying one image on another without uploading files.
How to overlay two images with Image Overlay
- Open the Image Overlay tool in your browser tab.
- Click the base image slot and pick a JPG, PNG, or WebP from your device. The file must be at most 25 MiB on disk; after decoding, it must fit within 20,000 pixels per edge and 40,000,000 total pixels.
- Click the overlay image slot and pick the second JPG, PNG, or WebP. The same size and dimension rules apply independently to this file.
- Choose a position: center, top left, top right, bottom left, or bottom right. Each is a fixed coordinate, not a draggable handle.
- Set the overlay scale. The percentage applies to the overlay's own natural width and height; 100% keeps it as-is, 50% halves both dimensions, and 200% doubles both dimensions. The valid range is 10% through 200%.
- Set the overlay opacity. Zero percent makes the overlay invisible but still produces a base-size PNG; one hundred percent uses the overlay's own alpha unchanged. The valid range is 0% through 100%.
- Click Create (or the equivalent action). The tool clears the canvas, draws the base at full size with alpha 1, applies the chosen overlay alpha, draws the scaled overlay at the planned coordinates, and exports a PNG.
- Inspect the preview, then click Download to save the PNG to your device.
If the overlay at the chosen scale extends past the edge of the base, the overflowing pixels are clipped — the base does not resize to accommodate them. If you need that clipped content visible, lower the scale or edit the overlay source first.
The five positions and how they are calculated
The position control has exactly five values. Each maps to a deterministic pair of x and y coordinates relative to the top-left of the base. Half-pixel coordinates are kept as half-pixels so the overlay stays mathematically centered when the base and overlay widths differ by an odd number of pixels.
| Position | X coordinate | Y coordinate |
|---|---|---|
| Top left | 0 | 0 |
| Top right | baseWidth − overlayWidth | 0 |
| Bottom left | 0 | baseHeight − overlayHeight |
| Bottom right | baseWidth − overlayWidth | baseHeight − overlayHeight |
| Center | (baseWidth − overlayWidth) ÷ 2 | (baseHeight − overlayHeight) ÷ 2 |
Worked example for center with a base of 1600×900 and a scaled overlay of 300×150: x = (1600 − 300) ÷ 2 = 1300 ÷ 2 = 650; y = (900 − 150) ÷ 2 = 750 ÷ 2 = 375. These are pixel coordinates, not percentages; if you want to reason in percentages, compute them from the scaled overlay dimensions yourself.
Scale and opacity, and how they interact
Scale is explicit and applies only to the overlay. The two dimensions are multiplied by the same factor, so the aspect ratio of the overlay is preserved at every setting. The valid range is 10% to 200%; values outside that range are not accepted. This is not an automatic fit-to-base percentage — 50% scale always means half of the overlay's own natural dimensions, regardless of how wide the base is.
Opacity is a global alpha multiplier applied to the overlay after the base is drawn. Zero makes the overlay fully transparent while still producing a base-size PNG. One hundred uses whatever alpha the overlay already has — for a PNG with transparent pixels, those pixels stay transparent; for a JPG, every pixel is opaque. Intermediate values multiply the overlay's contribution by that fraction, so a 50% setting is roughly half as visible as the overlay's own pixels would be at 100%.
| Setting | Range | What 50% means here | What 100% means here |
|---|---|---|---|
| Scale | 10%–200% | Overlay drawn at 0.5 × its own width and 0.5 × its own height | Overlay drawn at its own natural width and height |
| Opacity | 0%–100% | Overlay contributes half its pixel color | Overlay contributes its full pixel color |
The renderer applies scale and opacity in a fixed order — clear canvas, draw base, save state, set global alpha, draw scaled overlay, restore state — and that order is the same in production code and in the golden tests, so the preview you see and the PNG you download are produced by the same draw plan.
Common uses for a single-overlay workflow
A single-overlay tool covers the predictable cases that designers and creators hit most often. Corner logos use a small, fully opaque PNG placed at top left or top right at 10%–25% scale. Center watermarks use a translucent badge or wordmark centered at 30%–60% scale and 20%–50% opacity. Frame details use a corner ornament at one of the four corners, often fully opaque. Texture or credit labels use a faded overlay at 100% scale covering the full base at low opacity to add a paper grain or a credit line.
For these cases, free dragging, rotation, blend modes, and masks are unnecessary. One overlay, one position, one scale, and one opacity is enough — and the base should come out at its natural pixel dimensions.
Limits to know before you start
The tool does not provide rotation, free dragging, arbitrary coordinates, margins, blend modes, masks, background removal, repeated tiling, or multi-layer editing. If your workflow needs any of those, this is the wrong tool, not a buggy version of the right one.
The base image is never resized. The output PNG always uses the base's natural width and height. The overlay is the only thing that changes size, and only by the scale you set. If the overlay at the chosen scale is larger than the base, its position can produce negative coordinates and the portion outside the base canvas is clipped — that is intentional behavior, not a hidden resize.
JPEG, PNG, and WebP are accepted. GIF, SVG, AVIF, and other formats are outside the focused scope. Each compressed file may be at most 25 MiB on disk (equal to 26,214,400 bytes); after decoding, each image is independently capped at 20,000 pixels per edge and 40,000,000 total pixels. These decoded limits exist because a small compressed file can expand into a very large pixel buffer that would exhaust browser canvas memory. The boundary value is accepted; one byte, pixel-budget increment, or edge pixel beyond the limit is rejected with no partial output.
Re-encoding to PNG does not promise to preserve EXIF metadata, camera metadata, animation, embedded text, or original compression. For precision design work, inspect the downloaded PNG at full size in your usual image editor and keep both originals so you can re-export at any time.
If you're weighing options, Convert Pixelated Image to HD With a Local Block Tool covers this in detail.