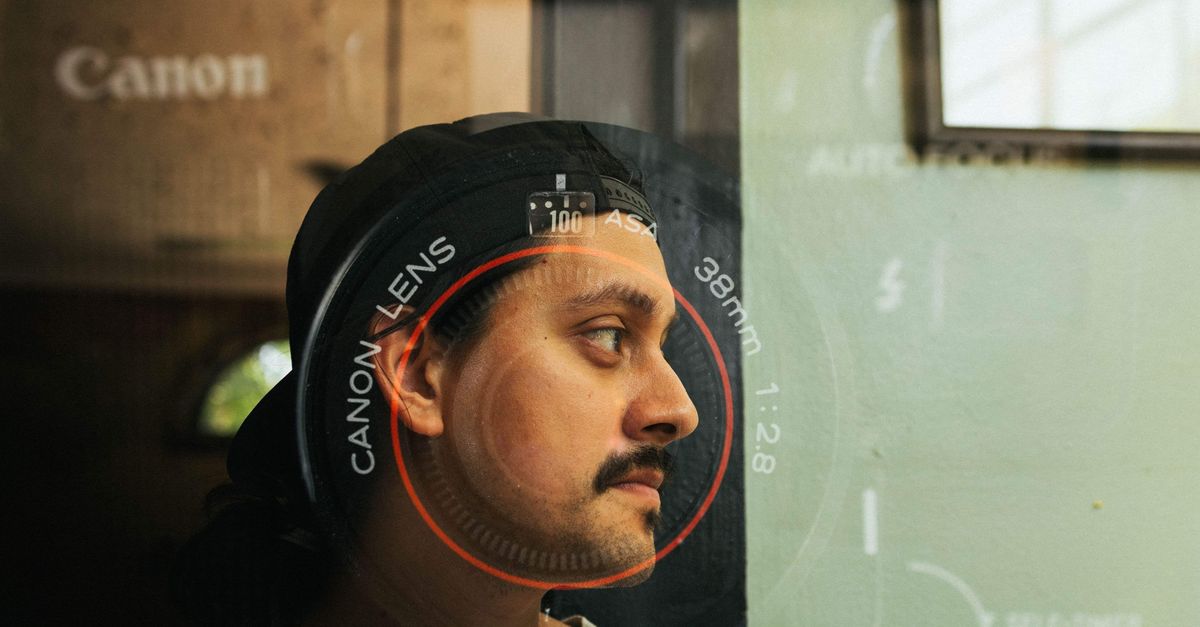
An image overlay is a technique that places one image on top of another to create a single, blended composition. This method is widely used in graphic design, social media content, marketing materials, and web development to add text, logos, watermarks, or decorative elements without altering the original images. Unlike traditional editing software, browser-based tools like the Image Overlay tool allow you to combine images instantly without uploading files to a server, ensuring privacy and speed. Whether you’re adding a logo to a product photo, creating a collage, or designing a promotional graphic, overlays provide a flexible way to enhance visuals while maintaining control over positioning, size, and transparency.
Overlaying images traditionally required desktop software like Photoshop or online editors that upload your files to a remote server. These methods can be time-consuming, especially if you’re working with large files or need quick edits. Browser-based tools eliminate these barriers by processing images locally, meaning your files never leave your device. This approach is ideal for users who prioritize speed, privacy, or simplicity. For example, if you’re preparing images for a website, you can overlay a transparent logo on multiple product photos in minutes, adjusting the opacity to ensure the logo doesn’t overpower the main image. Similarly, designers can experiment with different overlay positions and scales to achieve the desired effect without committing to permanent changes.
When to Use an Image Overlay
Image overlays are versatile and serve multiple purposes across different fields. Here are some common scenarios where overlays are particularly useful:
| Use Case | Example | Benefits of Overlay |
|---|---|---|
| Branding and watermarking | Adding a company logo to product photos | Protects images from unauthorized use while maintaining visibility |
| Social media graphics | Overlaying text or icons on a background image for posts | Creates eye-catching visuals without designing from scratch |
| Web design | Placing a call-to-action button over a hero image | Enhances user engagement without altering the original image |
| Photo editing | Combining two photos for a double-exposure effect | Achieves artistic effects without advanced editing skills |
| Marketing materials | Overlaying a discount banner on a product image | Quickly updates promotional visuals without redesigning the entire image |
Overlays are also valuable for accessibility. For instance, you can overlay text on an image to provide context for screen readers, ensuring your content is inclusive. Unlike static images with embedded text, overlays allow you to adjust the text’s position, size, and opacity to meet accessibility standards like WCAG. For example, if you’re overlaying text on a busy background, you can reduce the opacity of the overlay to improve readability while keeping the original image intact.
How to Overlay Images in Your Browser
Overlaying images in your browser is straightforward with the Image Overlay tool. Follow these steps to combine two images without uploading them to a server:
- Choose your images: Select a base image (the background) and an overlay image (the image you want to place on top). Both images can be JPG, PNG, or WebP files up to 25 MiB in size.
- Upload the files: Drag and drop the images into the tool or click to browse your device. The tool processes the images locally, so no data is sent to a server.
- Position the overlay: Select where the overlay should appear on the base image. Options include the center or any of the four corners (top-left, top-right, bottom-left, bottom-right).
- Adjust the scale: Set the overlay’s size relative to its original dimensions. For example, a scale of 50% reduces the overlay to half its original size, while 200% doubles it.
- Set the opacity: Use the opacity slider to control how transparent the overlay is. A lower opacity (e.g., 30%) blends the overlay subtly with the base image, while 100% makes it fully opaque.
- Preview and download: Inspect the preview to ensure the overlay looks as expected. If satisfied, click the download button to save the result as a full-resolution PNG. The tool preserves transparency if your overlay image has an alpha channel.
This process is entirely local, meaning your images are never stored or shared online. It’s ideal for quick edits, such as adding a logo to a batch of product photos or creating social media graphics on the fly. If you need to make further adjustments, such as resizing the base image or compressing the final output, you can use complementary tools like the Image Resizer or Image Compressor.
Overlay vs. Other Image Editing Techniques
Image overlays are one of several techniques for combining or enhancing images. Understanding how overlays compare to other methods can help you choose the right approach for your project. The table below highlights key differences between overlays and other common techniques:
| Technique | Description | Best For | Limitations |
|---|---|---|---|
| Image Overlay | Places one image on top of another with adjustable position, scale, and opacity | Adding logos, text, or decorative elements to photos | Limited to two images at a time |
| Collage | Arranges multiple images in a grid or custom layout | Displaying multiple photos in a single frame | Less flexible for blending images seamlessly |
| Double Exposure | Blends two images using advanced blending modes (e.g., screen, multiply) | Artistic or surreal compositions | Requires software like Photoshop for precise control |
| Watermarking | Embeds a semi-transparent logo or text into an image | Protecting images from unauthorized use | Can be distracting if not applied subtly |
| Text Overlay | Adds text directly onto an image | Creating memes, quotes, or promotional graphics | Text may become unreadable on busy backgrounds |
Overlays are particularly useful when you need to combine two images without permanently altering either one. For example, if you’re designing a website banner, you can overlay a call-to-action button on a hero image without editing the original photo. This approach allows you to experiment with different designs and revert changes easily. In contrast, techniques like double exposure or collages are better suited for creative projects where blending or arranging multiple images is the primary goal.
Another advantage of overlays is their compatibility with other editing techniques. For instance, you can overlay a logo on a photo, then use the Blur Image tool to soften the background and draw attention to the logo. Similarly, you can overlay text on an image and adjust its opacity to ensure readability, as recommended by WCAG guidelines. This flexibility makes overlays a valuable tool in any designer’s toolkit.
Tips for Effective Image Overlays
Creating a professional-looking overlay requires attention to detail. Here are some tips to ensure your overlays look polished and achieve their intended purpose:
- Choose the right opacity: Opacity determines how much of the base image shows through the overlay. For logos or watermarks, a lower opacity (e.g., 20-40%) ensures the overlay is visible without distracting from the main image. For text overlays, higher opacity (e.g., 80-100%) improves readability, especially on busy backgrounds.
- Match the scale to the context: The size of the overlay should complement the base image. For example, a small logo in the corner of a product photo looks professional, while a large overlay covering most of the image may appear intrusive. Use the scale slider to adjust the overlay’s size relative to its original dimensions.
- Position strategically: The position of the overlay can influence the viewer’s focus. For instance, placing a logo in the bottom-right corner is less distracting than centering it. Similarly, overlaying text in the top-left or top-right corner ensures it doesn’t interfere with the main subject of the image.
- Use high-quality images: Overlays work best when both the base and overlay images are high resolution. Low-quality images can appear pixelated when scaled or combined, detracting from the final result. If your overlay image is small, consider resizing it using the Image Resizer before overlaying it.
- Test on different backgrounds: If you’re overlaying a logo or text, test it on various backgrounds to ensure visibility and contrast. For example, a white logo may disappear on a light background, while a dark logo may be hard to see on a black background. Adjust the opacity or add a subtle border to improve visibility.
For designers working with accessibility in mind, overlays can be a powerful tool for creating inclusive visuals. For example, you can overlay descriptive text on an image to provide context for screen readers, as recommended by W3C’s Web Accessibility Initiative. This approach ensures your content is accessible to all users while maintaining the visual appeal of your images.
Pitfalls to Watch For
While overlays are simple to create, a few common mistakes can undermine their effectiveness. Here’s what to watch out for:
- Overcrowding the image: Adding too many elements to an overlay can make the image look cluttered. Stick to one or two key elements (e.g., a logo and a short text) to keep the design clean and focused.
- Ignoring contrast: Low contrast between the overlay and the base image can make the overlay hard to see. For example, white text on a light background may disappear entirely. Use the opacity slider to adjust contrast or choose a different position for the overlay.
- Using low-resolution overlays: A pixelated overlay can ruin an otherwise high-quality image. Always use high-resolution images for overlays, especially if you plan to scale them up. If your overlay image is small, consider recreating it at a higher resolution or using a vector format like SVG.
- Forgetting about transparency: If your overlay image has a solid background, it may block the base image entirely. Use PNG files with transparent backgrounds for overlays to ensure seamless blending. Tools like the JPG to PNG converter can help you prepare images with transparency.
- Overlooking file size: Large overlay files can slow down your website or make downloads cumbersome. Compress the final image using the Image Compressor to reduce file size without sacrificing quality.
By avoiding these mistakes, you can create overlays that enhance your images without detracting from their visual appeal. if you're adding a logo to a product photo or creating a promotional graphic, overlays offer a quick and effective way to elevate your visuals.
See also: How to Generate a Favicon from Any Image.
For a deeper look, see How to Rotate an Image Left, Right, or 180 Degrees.
For a deeper look, see Convert Image to ASCII: Local PNG, JPEG, GIF & WebP.
For a deeper look, see Remove EXIF Data from Photos Without Uploading Files.