To convert RGB to CMYK in Illustrator, designers typically use Edit > Edit Colors > Convert to CMYK, which changes the entire document's color mode and remaps every fill and stroke from additive RGB light to subtractive CMYK ink percentages. The remapping is automatic, but Illustrator does not guarantee the new CMYK values will look identical to the original RGB colors, especially in saturated blues, vivid greens, and bright oranges that sit outside the CMYK gamut. Many illustrators therefore pre-check the most important brand colors in a browser-based converter before flipping the document mode, so they know exactly which swatches are likely to shift and which will translate cleanly.
Working in RGB inside Illustrator is ideal for digital deliverables: screen previews look correct, file sizes stay compact, and any bitmap effects, gradient meshes, or live previews render at full quality. Print, however, is a four-ink process. Commercial presses lay down cyan, magenta, yellow, and black in separate plates, and a file that is still in RGB when it reaches prepress will be auto-converted by the RIP, often producing muddy cyans, washed-out reds, and unexpected color casts. Converting to CMYK while you still control the file gives you the chance to fix problem colors one by one, rebuild critical swatches from CMYK percentages, and run a soft proof before exporting the final PDF.
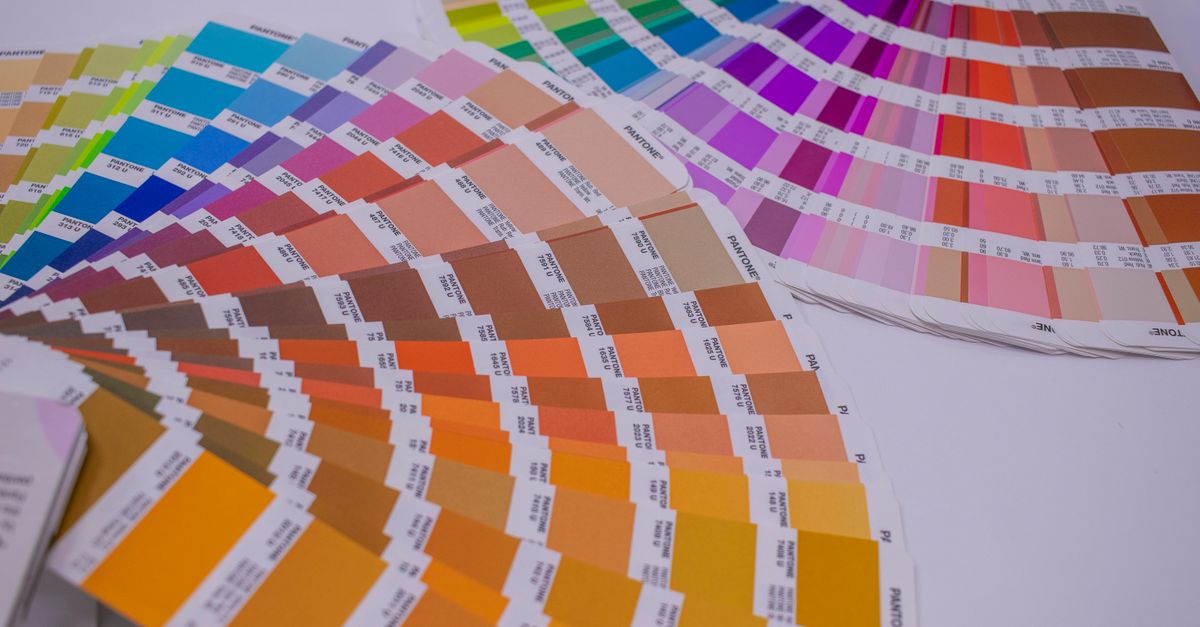
Why Illustrator's Built-In Conversion Sometimes Shifts Colors
RGB and CMYK are not interchangeable. RGB describes light emitted from a backlit display, with each channel ranging from 0 to 255. CMYK describes ink absorbed by paper, with each channel expressed as a percentage from 0 to 100. The two color spaces cover different volumes of visible color, a property called gamut. RGB is larger than CMYK on the saturated end, meaning some RGB colors simply have no exact CMYK equivalent.
When Illustrator encounters an out-of-gamut RGB color during a document-wide conversion, it snaps the color to the nearest reproducible CMYK value. Adobe's documentation describes this as a permanent color change rather than a lossless format swap, and the result is the visible "dull" or "muted" look designers often notice after pressing the Convert to CMYK command. According to Adobe's documentation on image color modes, any out-of-gamut color is clipped to the closest reproducible value, and that adjustment cannot be reversed once the document is saved and reopened.
The practical effect is most obvious in:
- Vivid blues and cyans, where the RGB values exceed what cyan and magenta ink can produce on coated paper.
- Saturated greens, which lose luminance because yellow ink alone cannot match the brightness of an RGB green channel at full intensity.
- Bright oranges and neon reds, which often come out darker and slightly desaturated after conversion.
- Pure black text set in RGB rich black, which becomes a true black only after CMYK conversion.
Pre-Checking Colors in a Browser-Based Converter
A quick way to see exactly what Illustrator will produce is to enter the original RGB values into a browser tool first. The RGB to CMYK Converter accepts three integer channels between 0 and 255 and returns the equivalent CMYK percentages along with the HEX value and a live swatch preview. You can also paste CMYK values into the same tool to read the matching RGB and HEX, which is useful when a printer supplies you with house colors in CMYK and you need them as RGB for a screen mockup.
Using the converter before you touch Illustrator's mode setting helps you make informed decisions:
- Identify the swatches that are likely to drift the most after conversion.
- Decide whether to adjust those RGB values toward the center of the CMYK gamut, accept the converted result, or replace the color with a custom CMYK swatch built from explicit percentages.
- Record the CMYK percentages for any spot or brand-critical colors so you can type them directly into Illustrator's Color panel after the document is in CMYK mode.
Convert RGB to CMYK in Illustrator Step by Step
Once your key colors have been checked, the actual conversion inside Illustrator is a four-step process. Open the file you want to print and confirm the document is currently set to RGB by looking at the title bar or by choosing File > Document Color Mode.
- Save a backup copy of the working RGB file, because converting the document color mode is not reversible once the file is saved.
- Choose Edit > Edit Colors > Convert to CMYK. Illustrator will remap every fill, stroke, and graphic style to CMYK equivalents in one pass.
- Open the Color panel and verify the most important swatches by selecting each one and reading the new C, M, Y, and K percentages. If a swatch has shifted more than you expected, type the target CMYK percentages manually, or revisit the RGB to CMYK Converter to confirm the numbers.
- Turn on soft proofing via View > Proof Colors, or use Window > Proof Setup to pick a target printer profile such as Coated GRACoL 2006. Soft proofing simulates how the converted CMYK file will look on press and highlights any remaining out-of-gamut warning icons in the panel.
Comparing the Conversion Path
Different workflows suit different deliverables. The table below compares the common approaches illustrators use when moving from RGB to CMYK, including where a browser converter fits in.
| Approach | Best for | Gives explicit CMYK numbers | Risk of color shift |
|---|---|---|---|
| Browser RGB to CMYK Converter before conversion | Pre-checking brand and spot colors | Yes | None, read-only |
| Edit > Edit Colors > Convert to CMYK in Illustrator | Full document conversion in one pass | Via the Color panel after conversion | Moderate to high for saturated colors |
| Assigning a new color profile without converting | Soft-proofing only, keeping RGB data intact | No | None until final conversion |
| Building CMYK swatches manually from percentages | Brand-critical spot colors | Yes, entered by hand | Low when numbers are verified |
For designers handling tight brand guidelines, the safest workflow is a two-pass job: first read the CMYK percentages in a browser tool, then apply those exact numbers to rebuilt swatches in Illustrator after the document has been converted.
Reading the Numbers Out of a Browser Tool
The RGB to CMYK Converter uses standard web color math: each RGB channel is divided by 255 to produce a 0 to 1 value, the maximum of red, green, and blue is set as the black key, and the remaining channels are scaled by the formula K = 1 - max(R, G, B), with C, M, and Y each derived from (max - channel) / (1 - K). For a concrete example, take RGB (255, 0, 0), a pure red.
The conversion proceeds as follows:
- Normalize: R = 1, G = 0, B = 0.
- Compute the key: K = 1 - max(1, 0, 0) = 0, so K = 0 percent.
- Compute cyan: C = (1 - 1 - 0) / (1 - 0) = 0 percent.
- Compute magenta: M = (1 - 0 - 0) / (1 - 0) = 1, so M = 100 percent.
- Compute yellow: Y = (1 - 0 - 0) / (1 - 0) = 1, so Y = 100 percent.
- Result: CMYK (0, 100, 100, 0), which matches the expected pure red in print.
Run that through the converter and the live swatch preview will show a vivid magenta-red. It is a useful sanity check for any color where the on-screen RGB value looks brighter than the printed result might suggest.
Pairing Browser Checks With Illustrator Soft Proofing
The browser tool answers a math question: given these RGB channels, what CMYK percentages follow? Illustrator answers a different, equally important question: given this CMYK file, how will it actually print on a specific press with a specific paper stock. The two work together well. Use the converter to set your CMYK swatch percentages up front, convert the Illustrator document, then run a soft proof against a real profile such as SWOP or GRACoL.
If the soft proof still looks off, revisit the converter for any color that shifted more than a few percentage points, rebuild the swatch, and reapply. For projects that include raster imagery, run the same pre-check on the dominant RGB tones inside your placed photos, then open those images in Photoshop and convert them to CMYK there so you control the conversion rather than letting Illustrator flatten them.
Common Pitfalls When Converting in Illustrator
A few habits save a lot of rework time:
- Always duplicate the file before converting, so the RGB master remains available for digital exports.
- Do not rely on auto-conversion for spot colors, logo fills, or brand-defining accents. Verify each one through the converter and type the CMYK percentages in manually.
- Avoid setting rich black in RGB. Build rich black directly in CMYK using values such as C 60, M 40, Y 40, K 100 for a denser print result.
- Recheck white objects. Pure RGB white (255, 255, 255) becomes CMYK (0, 0, 0, 0), which prints as no ink and lets the paper show through, which is usually correct but worth confirming for any element that should print opaque white.
- For broader print prep beyond Illustrator, the guide on converting RGB to CMYK for print in your browser covers additional checks that apply across design tools.
For illustrators who regularly reverse the process, the RGB to CMYK Converter also accepts CMYK percentages on input and returns the matching RGB and HEX, which is helpful when porting house colors from a printer's swatch book back into a digital mockup. Pair that capability with a quick visual check in the Color Palette Generator to see how the converted palette holds together before you commit the whole document to CMYK.
If you're weighing options, Convert RGB Values to HEX Color Codes Instantly covers this in detail.