To convert RGB to CMYK in Clip Studio Paint, use a browser-based RGB to CMYK Converter that shows exact CMYK percentages for print. Clip Studio Paint defaults to RGB color mode, which is ideal for digital art but not for professional printing. Print shops use CMYK (Cyan, Magenta, Yellow, Key/Black) to mix ink on paper, and RGB colors often appear dull or shifted when printed. The converter solves this by translating RGB values (0–255) into CMYK percentages (0–100%) instantly, with a live preview to confirm accuracy. You can then copy the CMYK values and apply them directly to your Clip Studio artwork without changing the document’s color mode.
Many artists assume they must switch their entire Clip Studio file to CMYK mode to prepare for print, but this can cause unexpected color shifts and complicate editing. Instead, you can keep your file in RGB for flexibility and convert only the colors that will be printed. This approach is especially useful for spot colors, logos, or text that must match a brand’s print guidelines. The RGB to CMYK Converter simplifies the process by letting you input RGB values from Clip Studio’s color picker and instantly see the equivalent CMYK percentages. You can also reverse the process—enter CMYK values to get RGB—if you’re working with a printer’s color specifications.
For example, if your digital artwork uses a bright red (RGB 255, 0, 0), the converter will show its CMYK equivalent (0%, 100%, 100%, 0%). You can then manually adjust Clip Studio’s color sliders to these percentages or use the tool’s copy function to paste them directly. This method ensures your printed colors match your digital design as closely as possible. For projects requiring precise color matching, such as business cards or book covers, this tool eliminates guesswork and reduces the risk of costly print errors.
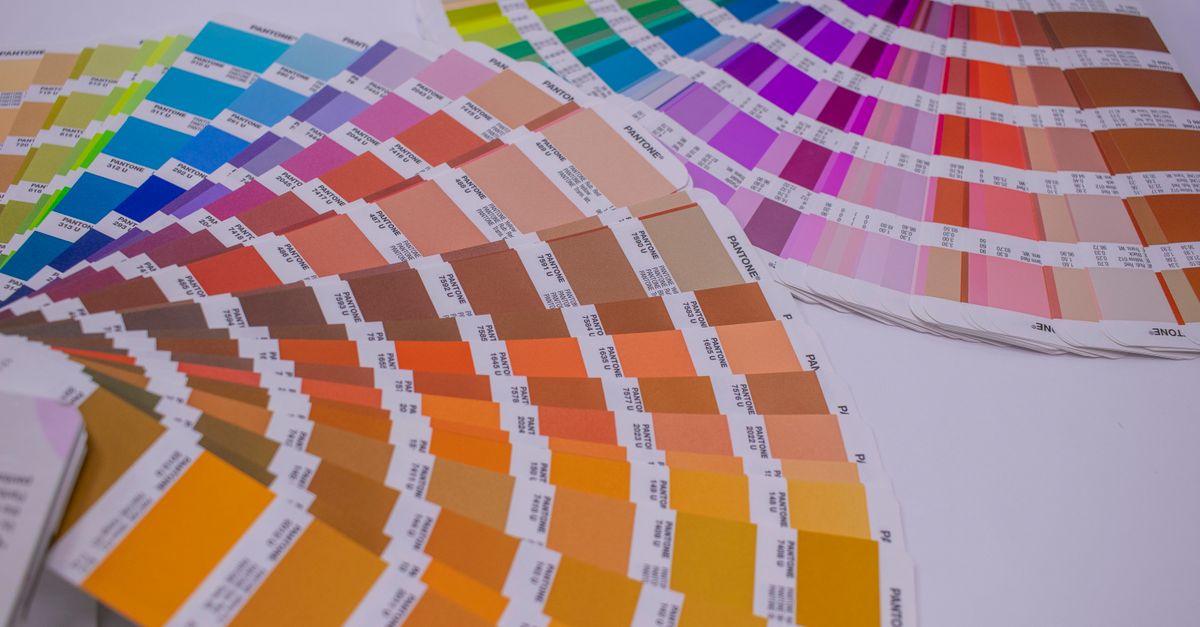
Why RGB and CMYK Are Different for Print
RGB and CMYK are two distinct color models designed for different purposes. RGB (Red, Green, Blue) is an additive color model used for screens, where colors are created by combining light. When all three colors are at full intensity (255, 255, 255), the result is white. CMYK (Cyan, Magenta, Yellow, Key/Black), on the other hand, is a subtractive model used for print. Inks absorb light, so combining all four colors at full intensity (100%) produces a dark brown or black, not pure black. This fundamental difference explains why RGB colors often look muted or shifted when printed in CMYK.
Print shops rely on CMYK because it aligns with the four-color printing process. Each color is applied as a separate layer of ink, and the percentages determine how much of each ink is used. For example, a deep blue might require 100% Cyan and 50% Magenta, while a pastel green could use 30% Cyan and 10% Yellow. If you send an RGB file to a printer, they will convert it to CMYK, but the results may not match your expectations. Bright neon greens or electric blues, which are easy to create in RGB, often fall outside the CMYK gamut and appear duller in print. Using the RGB to CMYK Converter lets you preview these shifts before sending your file to the printer, saving time and reprint costs.
Another key difference is the range of colors each model can produce. RGB has a wider gamut, meaning it can display more vibrant and saturated colors than CMYK. This is why some colors, like bright oranges or purples, are difficult to reproduce accurately in print. The converter helps you identify these out-of-gamut colors by showing the closest CMYK match. For instance, a vivid purple in RGB (128, 0, 128) might convert to a darker, less saturated CMYK (50%, 100%, 0%, 0%). Knowing this in advance allows you to adjust your design or choose alternative colors that print more reliably.
How to Convert RGB to CMYK in Clip Studio Paint
Converting RGB to CMYK in Clip Studio Paint is straightforward with the RGB to CMYK Converter. Follow these steps to ensure your colors are print-ready:
- Open Clip Studio Paint and select the color: In your artwork, use the color picker to select the RGB color you want to convert. Note the RGB values (e.g., 255, 100, 50).
- Open the RGB to CMYK Converter in your browser: Go to /color/rgb-to-cmyk/ in any modern browser (Chrome, Firefox, Edge, or Safari).
- Enter the RGB values: In the converter, type the RGB values (0–255) into the corresponding fields. The tool will instantly display the equivalent CMYK percentages (0–100%).
- Check the live preview: The converter shows a color swatch of the converted color. Compare it to your original RGB color to ensure it’s a close match. If the color looks too dull, you may need to adjust your design or choose a different RGB value.
- Copy the CMYK values: Click the "Copy" button next to the CMYK percentages to save them to your clipboard.
- Apply the CMYK color in Clip Studio: Return to Clip Studio Paint and open the color picker. Manually enter the CMYK percentages into the CMYK sliders or paste them if the software supports it. Your color will now match the print-ready version.
- Repeat for all colors: Convert and apply CMYK values to all colors in your design that will be printed. For large projects, consider using the Color Palette Generator to organize your colors before converting them.
When to Use the RGB to CMYK Converter
The RGB to CMYK Converter is essential for any project that will be printed professionally. Here are common scenarios where you’ll need it:
- Business cards and stationery: Logos and brand colors must match exactly in print. Converting RGB to CMYK ensures consistency across business cards, letterheads, and envelopes.
- Book covers and illustrations: Self-published authors and illustrators often design in RGB but need CMYK for print-on-demand services. The converter helps avoid color shifts that can make artwork look flat or inaccurate.
- Marketing materials: Brochures, flyers, and posters require CMYK for professional printing. Using the converter ensures your brand colors remain vibrant and recognizable.
- Comic books and zines: Independent comic artists often print small batches of their work. Converting RGB to CMYK before printing prevents unexpected color changes in skin tones, backgrounds, or special effects.
- Product packaging: If you’re designing packaging for a product, CMYK is the standard for printing. The converter helps you preview how colors will look on labels, boxes, or bags.
Even if you’re not printing your work, the converter is useful for collaborating with printers or clients who provide CMYK specifications. For example, a client might request a logo in CMYK (70%, 0%, 100%, 0%). You can enter these values into the converter to see the RGB equivalent, allowing you to design in Clip Studio Paint while ensuring the final print matches the client’s expectations.
For digital artists who occasionally print their work, the converter is a time-saver. Instead of switching your entire Clip Studio file to CMYK mode—which can alter colors and slow down performance—you can convert individual colors as needed. This approach keeps your workflow flexible while ensuring print-ready results.
Common RGB to CMYK Conversion Challenges
Converting RGB to CMYK isn’t always a perfect match, and understanding the limitations can help you avoid frustration. Here are some common challenges and how to address them:
| Challenge | Cause | Solution |
|---|---|---|
| Colors appear dull or muted in CMYK | RGB has a wider gamut than CMYK, so some vibrant colors can’t be reproduced in print. | Use the converter to preview the closest CMYK match, then adjust your design or choose alternative colors that print more accurately. |
| Black text looks gray or fuzzy | RGB black (0, 0, 0) converts to a mix of CMYK colors, which can appear uneven when printed. | Use "rich black" (e.g., 60% Cyan, 40% Magenta, 40% Yellow, 100% Black) for solid, crisp black text in print. |
| Neon or fluorescent colors shift dramatically | Neon colors are outside the CMYK gamut and often convert to darker or less saturated versions. | Avoid using neon colors for print projects, or use spot colors (Pantone) if precise reproduction is critical. |
| Color banding in gradients | Gradients in RGB may not transition smoothly when converted to CMYK due to limited ink mixing. | Use the Color Gradient Generator to create print-friendly gradients and preview them in CMYK. |
Another challenge is color consistency across different printers. Even with the same CMYK values, colors can vary slightly depending on the printer, ink, and paper used. To minimize discrepancies, request a printed proof from your printer before finalizing a large order. This allows you to adjust your design if the printed colors don’t match your expectations.
For artists who rely on specific color profiles, such as those provided by print shops, the converter can still be useful. Some printers supply ICC profiles that adjust CMYK values for their equipment. You can enter these adjusted CMYK values into the converter to see the RGB equivalent, ensuring your digital design aligns with the printer’s specifications.
How to Prepare Your Clip Studio File for Print
Converting RGB to CMYK is just one step in preparing your Clip Studio Paint file for print. Here’s a checklist to ensure your artwork is print-ready:
- Keep your file in RGB mode: Unless your printer specifically requests a CMYK file, keep your Clip Studio file in RGB mode for flexibility. Convert individual colors to CMYK as needed using the RGB to CMYK Converter.
- Use high resolution: Set your document resolution to 300 DPI (dots per inch) for print. Lower resolutions (e.g., 72 DPI) are suitable for digital but will appear pixelated in print.
- Check color profiles: If your printer provides an ICC profile, apply it to your file to ensure color accuracy. Clip Studio Paint supports ICC profiles, which you can load under File > Color Settings.
- Convert text to outlines: To prevent font issues, convert all text to outlines or paths before exporting. This ensures your text appears exactly as designed, even if the printer doesn’t have your font installed.
- Export as a PDF: Save your file as a PDF/X-1a or PDF/X-4 for print. These formats embed color profiles and ensure compatibility with most printers. In Clip Studio, go to File > Export (Single Layer) > PDF and select the appropriate settings.
- Include bleed and crop marks: If your design extends to the edge of the paper, add a 3–5 mm bleed to account for trimming. Clip Studio Paint allows you to set bleed margins in the New Canvas dialog.
- Proof your colors: Use the RGB to CMYK Converter to preview how your colors will look in print. If possible, request a printed proof from your printer to confirm accuracy before finalizing your order.
For complex projects, such as multi-page books or magazines, consider using a professional prepress service. These services can handle color conversion, bleed settings, and file formatting to ensure your artwork prints flawlessly. However, for smaller projects like business cards or posters, the steps above are sufficient to achieve professional results.
If you’re unsure about any part of the process, the Convert RGB to CMYK for Print in Your Browser guide provides additional tips and troubleshooting advice. It covers topics like handling transparency, working with spot colors, and optimizing files for different print methods (e.g., offset vs. digital printing).
Related reading: Convert RGB to HEX Color Codes in Your Browser.
Related reading: Convert RGB to HEX Color Codes Instantly in Your Browser.
Related reading: Convert CMYK to RGB for Screen Preview in Your Browser.