A kitchen backsplash square footage is the length of the wall run multiplied by the height from the countertop to the underside of the cabinets, with both numbers converted to the same unit before they are multiplied. For a rectangular section, the formula is exactly the same as any other rectangle: area = length × width, where length and width must be expressed in compatible linear units. OpenStax's open textbook on contemporary mathematics notes that area calculation requires both linear dimensions in the same unit before multiplying (OpenStax — Measuring Area). The Tile Calculator takes that one rectangular surface, accepts its length and width in feet, inches, meters, or centimeters independently, and converts both to meters before computing the surface area. Because both sides of the multiplication are converted first, a backsplash measured in inches can be compared to a tile measured in centimeters without mixing linear and square conversion factors. The output gives you the surface area, the theoretical ratio of tiles needed, and the whole-tile count rounded up, which is what you actually need to buy.
What counts as the backsplash area
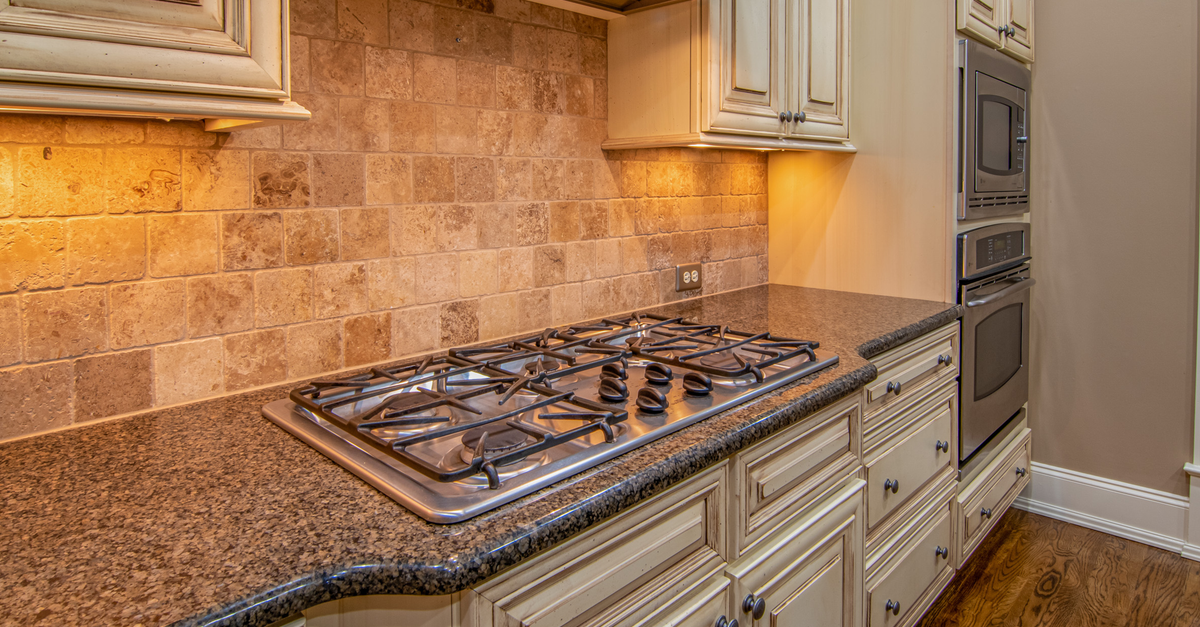
A backsplash is treated as one rectangular strip running along the wall. In practice, the surface that holds tile is bounded on three sides: the countertop below, the underside of the upper cabinets above, and any side walls or window casings at the ends. The length is the horizontal run, and the height is the vertical rise from the counter to the cabinets.
Measure the length along the countertop, not along an upper-cabinet face that may sit a slightly different distance from the wall. Measure the height at both ends because counters are rarely perfectly level and upper cabinets can sit a hair lower or higher where the wall bows. If the two heights differ by more than a quarter inch, use the larger of the two when you order, since the field of tile must reach the tallest point of the gap.
Most residential backsplashes are simple rectangles with a height of 15 to 18 inches and a length that follows the wall run. A common kitchen might be 10 feet of run at 18 inches of height, which yields a single rectangular surface. If the backsplash wraps a corner or breaks around a window, treat each straight section as its own rectangle and add the results, because the calculator only accepts one surface at a time.
The math behind tile backsplash square footage
The core geometry is rectangle area equals length multiplied by width. Both dimensions have to be in compatible linear units before you multiply, otherwise the area is wrong in a way that no simple "convert at the end" step can fix.
The exact SI conversion factors are documented by the National Institute of Standards and Technology (NIST — SI Units: Length). The relationships that matter for backsplashes are:
| Unit | Value in meters |
|---|---|
| 1 inch | 0.0254 m (exact) |
| 1 international foot | 0.3048 m (exact) |
| 1 centimeter | 0.01 m (exact) |
| 1 meter | 1.00 m |
Because the calculator converts every linear input to meters first, a 10-foot backsplash and a 3-inch tile can be entered without you having to convert them to the same unit. That single linear conversion step is why the resulting areas and tile counts are trustworthy, and why you should not try to convert square inches to square feet by dividing by 144 without first verifying both sides were entered consistently.
For a single rectangular surface the workflow is: convert length and width to meters, multiply them to get surface area in square meters, convert tile length and width to meters, multiply them to get one tile's area in square meters, then divide surface area by tile area to get the theoretical number of tiles.
How to calculate tile backsplash square footage with the Tile Calculator
The calculator is designed around one rectangular surface, which is exactly how most backsplash strips behave. Working through the inputs in order keeps the numbers honest.
- Measure the backsplash length and the backsplash height with a tape measure, then enter those two numbers in the surface fields. Pick the unit that matches how you measured — inches for most U.S. kitchens, feet for a long run, centimeters or meters for a metric plan.
- Look up the actual tile dimensions on the carton or the supplier's spec sheet, not the nominal size, and enter them in the tile length and tile width fields. Choose the unit that matches the tile spec, even if it differs from the surface unit.
- Set the extra allowance to a percentage that reflects your specific job, not a one-size-fits-all number. A straight subway layout with no corner wraps might use 5 to 10 percent; a diagonal pattern or a herringbone around a window might use 15 percent or higher.
- If the tiles are sold by the box and the carton states how many pieces it contains, enter that number in the tiles per box field. If the carton lists coverage in square feet instead, leave the box field blank and order by piece.
- Calculate and read the output. The base pieces are the theoretical minimum, the purchase pieces are the rounded-up total after your allowance, and the box count is the rounded-up number of cartons to buy.
- Reconcile the result with the actual layout. Confirm that the rounded-up pieces make sense against your sketch, that the box count matches what the supplier stocks, and that the percentage you used is the one your installer agreed to.
If you want a second opinion on the rectangle area itself before adding tiles into the mix, the guide on calculating rectangle area in square feet walks through the same length-times-width math with worked examples.
Choosing a waste allowance for a backsplash job
The extra allowance is a project-specific percentage between 0 and 50 percent, applied to the theoretical unrounded tile ratio before the calculator rounds up once. It is not a universal 10 percent rule, and the calculator does not pretend that it is. Different backsplash situations pull the right number in different directions.
For a single straight run of large-format tiles with very few cuts, 5 percent is often plenty. For a classic subway-tile pattern where every other row is offset, cuts at both ends of every course add up quickly and 10 percent is a more honest starting point. A diagonal layout or a herringbone around a window or range hood can chew through 15 to 20 percent of the tiles as offcuts. Mix that with brittle materials such as glass, hand-glazed ceramic, or natural stone, and breakage during handling pushes the number higher still.
If the tiles come from a single dye lot and you want to keep a few spares for future repairs behind the stove where splash marks and heat shorten tile life, build that reserve into the percentage rather than buying a separate spare carton later, when the dye lot may have changed. Talk to your installer before you lock the number in — their cutting plan and your pattern choice determine the right percentage more than any general rule.
From square footage to whole boxes
Once the surface area and one tile's area are known, dividing gives a theoretical ratio that almost never lands on a whole number. The calculator rounds that ratio upward because tiles are discrete pieces — any positive fraction of a tile still requires a whole extra tile before cuts and reuse can be assessed.
As an example, take a 10-foot backsplash at 18 inches tall covered with 3-inch by 6-inch subway tiles, with a 10 percent allowance and 10 tiles per box. Surface area: 10 ft × 1.5 ft = 15 sq ft, which is 120 in × 18 in = 2160 sq in. One tile: 3 in × 6 in = 18 sq in. Theoretical pieces: 2160 / 18 = 120 exactly. With 10 percent allowance: 120 × 1.10 = 132 pieces, rounded up to 132. Box count: 132 / 10 = 13.2, rounded up to 14 boxes.
The calculator reports the same numbers through its own unit pipeline. Both sides convert to meters first, the ratio lands at 120, and the 10 percent allowance brings the purchase count to 132. The piece count and the box count are reported separately so you can decide whether to round up by pieces or by cartons, and so you can spot when the box count is one carton short of a piece-count multiple — that gap is usually a sign that the allowance was too thin and a partial carton will be needed.
If the carton label sells the tile by coverage in square feet rather than by piece, the calculator will not produce a meaningful box count. In that case, divide the surface square footage by the carton coverage, round up, and order by coverage the way the supplier priced it. Do not mix a piece-based box count from the calculator with a coverage-based price from the supplier without first checking that the two numbers agree.
What the calculator does not do for a backsplash
A backsplash area estimate is the starting point for an order, not the order itself. The calculator treats both the wall and each tile as perfect rectangles and does not subtract outlets, window trim, under-cabinet lighting strips, range hood cutouts, or any other opening inside the field. For a small backsplash those openings are often negligible; for a run that crosses a window, two duplex outlets, and an under-cabinet light strip, those exclusions can shave several square inches and a meaningful number of tiles off the count.
The calculator does not split a backsplash around a corner into two rectangles automatically, does not compute grout joints, does not optimize cuts along the edges of the run, does not enforce expansion joints at the counter or cabinet transitions, and does not produce a setting plan. It also does not model dye-lot matching, partial-carton minimum orders, return policies, or the difference between nominal tile dimensions printed on the box and the actual measured dimensions of the tile in your hand. Confirm those details with the supplier and the installer before you place the order, and keep the measurement sketch and the receipt so any discrepancy can be reconciled later.
For an L-shaped or U-shaped backsplash, measure each straight section as its own rectangle and add the surface areas before dividing by one tile's area, or run the calculator once per section with the same tile and allowance settings and sum the purchase pieces. Trying to fit an L-shape into one rectangle will over-buy tile on the inside corner and under-buy it along the legs.
For a deeper look, see How to Calculate Tile for a Kitchen Backsplash.