To apply a blur effect, upload a JPG, PNG, or WebP image to the Blur Image tool, choose whether to soften the whole picture or one rectangular area, set a blur radius, and download the resulting full-resolution PNG — all without sending the file to a server. The blur effect itself is a pixel operation that averages each pixel with its neighbors over a chosen radius, so light radii produce a gentle softening while larger radii create the heavy haze used for backgrounds and stylized overlays. Because the tool draws the original picture onto a separate offscreen canvas at the image's natural pixel dimensions before applying the filter, the exported PNG keeps the same width and height as the source file rather than the smaller preview you see on the page. Rectangle mode adds precise pixel-coordinate targeting on top of that, with X, Y, width, and height entered in the original image's coordinate system so the selected area is repeatable and exact.
Where a Blur Effect Helps
A blur effect is one of the simplest image-editing adjustments because it works entirely on pixels and does not require masks, layers, or color corrections. It is most useful when you want to draw attention to part of a picture, disguise a small region, or prepare an asset for a layout where the original would compete with text or other graphics.
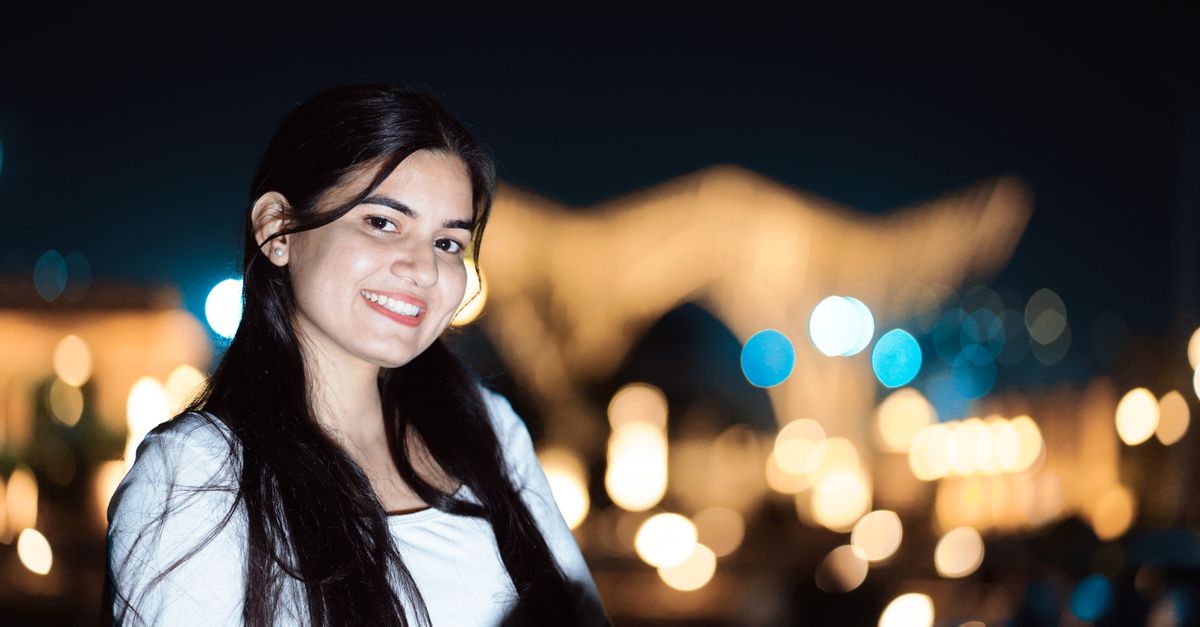
- Photo backgrounds. Soften everything behind a portrait so the subject reads more clearly.
- Screenshots and tutorials. Hide account numbers, email addresses, or usernames on a captured screen before sharing.
- Presentation and slide assets. De-emphasize a stock photo used behind text so headings stay legible.
- Draft graphics and prototypes. Suggest motion or mood in mockups without committing to a final look.
- Cover images and thumbnails. Reduce the visual noise behind a title or headline.
Full-Image vs. Rectangle Blur
Before you start, decide whether the whole picture should be softened or only a rectangular portion. The two modes share the same controls for radius and the same export pipeline, but the targeting is very different, and each has a different set of checks to perform after the download.
| Aspect | Full-Image Blur | Rectangle Blur |
|---|---|---|
| What it softens | Every pixel in the image | Only the pixels inside the chosen rectangle |
| Controls you set | Blur radius | X, Y, width, and height in original-image pixels, plus blur radius |
| Behavior at the boundary | Not applicable — the entire frame is blurred | Rectangle is clamped to fit inside the image; blur kernel can still blend a few neighboring pixels near the edge |
| Pixels outside the area | All are softened | Drawn unchanged from the source, except for a soft blend near the rectangle border |
| Best for | Even background softening, mood shots, draft visuals | Targeted edits such as a face, plate, signature, or single text field |
| Coordinate system | Not needed | Original-image pixels, with (0, 0) at the top-left corner |
Rectangle mode treats X and Y as the top-left corner of the region, measured in the same pixel units reported as the source image's displayed dimensions. If a rectangle runs past the bottom or right edge, the tool clamps it to the available image area rather than expanding the canvas or failing. For example, on a 1920 × 1080 source, a 600 × 400 region centered on the frame sits at X = (1920 − 600) / 2 = 660 and Y = (1080 − 400) / 2 = 340.
How to Apply a Blur Effect to an Image
- Open the Blur Image tool and choose a JPG, PNG, or WebP file from your device. Confirm the pixel dimensions displayed under the file picker before going further, because those numbers drive every coordinate you enter later.
- Pick the mode. Select full-image blur for an even softening of the whole picture, or switch to rectangle mode and enter X, Y, width, and height in the image's own pixels. If you are unsure where to start, the displayed dimensions tell you the maximum width and height available.
- Set the blur radius. A small radius produces a subtle softening that preserves most detail; a larger radius produces a heavy, dreamlike blur. Stay conservative for partial edits so you can re-render with a stronger radius if the first result looks too sharp.
- Choose the Blur image action and inspect the preview. The on-page preview may be smaller than the source so the browser can render it efficiently, so the preview is for layout and rough appearance only.
- Read the reported output dimensions next to the preview. These dimensions match the original image's natural pixel width and height, because the export is drawn onto a separate full-resolution canvas, not the reduced preview.
- Download the PNG. Open the downloaded file at 100 percent zoom in your system viewer to confirm the rectangle position, the radius strength, and the output size. If anything is off, adjust the coordinates or radius and generate again — each generation replaces the previous download object.
What Happens Inside the Browser When You Blur
Every step above runs locally in the current tab. The browser validates the file as JPEG, PNG, or WebP, then checks the file-size and decoded-pixel budgets before drawing anything. That is why inputs above 25 MB or above 40 megapixels are rejected with a specific message: a small compressed file can still decode into a very large image, and the canvas needs memory proportional to the decoded size, not the on-disk size.
Once the file passes validation, a shared draw plan clamps the blur radius and rectangle to safe ranges in the source image's natural pixel coordinates, then derives a separate proportional plan for the on-page preview. Rendering first draws the unchanged source pixels into the preview canvas. In rectangle mode, drawing is then clipped to the clamped rectangle and a filtered draw is performed through that clip, so pixels outside the rectangle stay as they were in the original. The Canvas API's filter property is what actually performs the blur at draw time, which is the standard browser mechanism documented in the MDN CanvasRenderingContext2D.filter reference.
For the download, the tool does not reuse the small preview canvas. It builds a separate offscreen canvas at the source image's natural width and height, draws the original pixels there, applies the same blur at full resolution, and produces a PNG through the canvas's toBlob method. That separation is what prevents a low-resolution export — a 900-pixel preview never silently becomes the final file.
File Limits and What to Check Before You Download
Two hard limits gate the workflow. The first is the on-disk size of the file: anything over 25 MB is rejected before decoding starts. The second is the decoded pixel count: anything over 40 megapixels is rejected even if the file itself is small, because the browser needs memory proportional to the uncompressed image. These messages appear before any blur is generated, so an over-limit file does not produce a partial or truncated output.
- Confirm the source dimensions. The displayed pixel width and height are the units used by rectangle mode. If they look different from what you expected, you are probably looking at the natural pixel size rather than the display size shown in another viewer.
- Inspect the preview, then the export. The on-page preview is sized for inspection, not for export. Always open the downloaded PNG at 100 percent zoom to confirm the rectangle, the radius, and the output dimensions.
- Look at the boundary. Because a blur kernel samples neighboring pixels, the rectangle's edge is not a hard cut. A face placed two pixels from the boundary can still bleed slightly into the blurred region. Increase the rectangle size or radius if you want more surrounding context in the transition.
- Re-render freely. Each new generation replaces the previous download object. Changing files or leaving the page releases the temporary object URLs, so nothing accumulates in your tab.
- Keep the original. A reliable working pattern is to upload a copy of the file, generate the blurred PNG, then compare the two side by side at full size.
Blur Effect Is Not the Same as Redaction
A blur is a visual effect, not a removal. The blurred pixels are still in the PNG, just averaged with their neighbors. In many cases that is enough — a casual viewer will not notice a softened face — but the underlying information is often recoverable, especially from a high-resolution export where the original pixels can be reconstructed, sharpened, or simply read by someone who knows what to look for. The same applies to license plates, account numbers, addresses, signatures, and text fields.
Use the Blur Image tool when the goal is presentation, design, or casual privacy. If the goal is to permanently hide a piece of information — for a published document, a legal disclosure, or a regulated dataset — cover or remove the source pixels in a workflow designed for redaction, and verify the exported file, its metadata, any hidden layers, and the surrounding context. The tool deliberately does not claim to anonymize, de-identify, or permanently delete content; it performs exactly the pixel operation you request and nothing more.
Pairing Blur with Other Local Image Edits
Once the blurred PNG is on disk, the same privacy-first approach carries through to the next edits. You can resize the result without re-uploading, crop it to focus on the blurred region, convert it to a smaller format for sharing, or extract a color palette to match a brand. Every step stays in the browser, so the file does not need to leave your device just to receive a second adjustment, and the original remains untouched on your machine throughout the workflow.
Related reading: How to Add a Background to a PNG File (Keep Same Size).
Related reading: How to Add a Background to a PNG in Photoshop.